Key: Hold Volume Down + Power button together for 7 seconds minimum. Phone will restart. Check if the SIM error cleared.
Your Samsung Galaxy showing “No SIM” or “SIM Not Detected” even though the card is in the tray? Follow these steps in order. Start from the top and work down until your SIM is detected.
Step 1: Force Restart Your Phone
Hold Volume Down + Power button together for 7 seconds minimum. Phone will restart. Check if the SIM error cleared.
If error persists, move to Step 2.
Step 2: Reseat the SIM Card
Power off completely (don’t just restart).
Use the SIM ejector tool or straightened paperclip. Push into the small hole on your phone’s edge until the tray pops out.
Remove the SIM card. Check the gold contacts for:
- Fingerprint smudges
- Scratches
- Corrosion or discoloration
Wipe the SIM gently with a microfiber cloth. Not tissue – it scratches.
Check the tray for bent pins or debris.
Put the SIM back in the tray. Make sure it sits flat, gold contacts facing the right direction.
Slide the tray back in until it’s completely flush with the phone’s edge. Zero gap.
Power on. Test.
Still not working? Step 3.
Step 3: Test Your SIM in Another Phone
Put your SIM card in a different phone. Any phone that takes the same size SIM.
If the SIM works in another phone: Your SIM is fine. The problem is your Galaxy phone’s hardware or software. Continue to Step 4.
If the SIM doesn’t work in another phone: Your SIM card is damaged. Skip to Step 11 to get a replacement from your carrier.
Step 4: Test Another SIM in Your Galaxy
Borrow a working SIM card from someone else. Insert it into your Galaxy phone.
If the other SIM works: Your original SIM is damaged. Skip to Step 11.
If the other SIM also fails: Your phone has a problem. Continue to Step 5.
Step 5: Reset Network Settings


This fixes corrupted network configurations. You’ll lose saved WiFi passwords and Bluetooth pairings, but SIM detection often starts working again.
Open Settings.
Tap General Management.
Tap Reset.
Tap Reset Network Settings.
Tap Reset Settings.
Tap Reset to confirm.
Phone will restart. Test the SIM.
Working now? Done. Still broken? Step 6.
Step 6: Run Samsung Members Diagnostics
Open the Samsung Members app. Don’t have it? Download from Galaxy Store.
Tap Get Help at the bottom.
Tap View Tests under Diagnostics.
Find “SIM Card” test and run it.
Also run “Mobile Network” test.
If tests fail: Your SIM reader hardware likely has issues. Skip to Step 14 for repair options.
If tests pass but you still have the error: Software issue. Continue to Step 7.
Step 7: One UI 7 Specific Fix (Phantom SIM Error)
Only do this if you’re on One UI 7 and getting repeated “SIM not inserted” notifications but your service actually works fine.
Try the reseating fix first:
- Remove SIM tray.
- Immediately slide it back in without changing anything.
- Check if notifications stop.
If that doesn’t work, try the brightness workaround:
Open Settings → Display.
Turn OFF auto-brightness.
Drag brightness slider all the way to the bottom.
Enable Airplane Mode. Wait 30 seconds.
Disable Airplane Mode.
Go back to Display settings and turn auto-brightness back ON if you want.
Check if the phantom notifications stopped.
Step 8: Check for Software Updates
Settings → Software Update → Download and Install.
If an update is available, install it. Samsung fixes SIM bugs through patches.
After updating, restart and test.
Step 9: eSIM Problems (If Using eSIM)
eSIM won’t activate or shows “activating” forever?
Delete the eSIM profile:
- Settings → Connections → SIM Manager
- Tap your eSIM
- Tap Remove
- Confirm removal
Contact your carrier for a fresh QR code. The old one might be corrupted.
Make sure you have WiFi or mobile data connection when activating. eSIM activation needs internet.
Scan the new QR code:
- Settings → Connections → SIM Manager
- Add eSIM
- Scan QR code from carrier
eSIM only works when physical SIM is inserted?
This is a known bug in S23, S24. Some users need their deactivated physical SIM in the tray for eSIM to function. No permanent fix yet – keep the dead physical SIM in the tray or wait for Samsung to patch it.
Step 10: Dual SIM Issues
Second SIM slot not detecting your card?
Settings → Connections → SIM Manager.
Check if SIM 2 appears at all:
If SIM 2 shows but is toggled off:
- Toggle it ON.
- Restart phone.
- Test.
If SIM 2 doesn’t appear:
- Power off phone.
- Remove both SIM cards.
- Swap their positions (SIM 1 goes to slot 2, SIM 2 goes to slot 1).
- Power on.
- Check SIM Manager again.
Step 11: Get a Replacement SIM from Your Carrier
If your SIM card tested bad in multiple phones, you need a new SIM.
Visit your carrier store or call support. They’ll deactivate the old SIM and issue a new one. Usually takes 10-15 minutes at a store.
Bring your account information and ID.
Step 12: Check Carrier Compatibility
Using an unlocked phone with a new carrier?
Check your model number: Settings → About Phone → Model Number.
SM-G990U1 = Unlocked U.S. model
SM-G990U = Carrier locked
Unlocked phones work with most carriers but your carrier might need to register your IMEI number on their network.
Call your carrier and give them your IMEI (Settings → About Phone → IMEI information). They’ll provision your line properly.
Step 13: Try Safe Mode (Check for App Interference)
Power off your phone.
Power on and immediately hold Volume Down when you see the Samsung logo.
Keep holding until the phone boots completely. “Safe Mode” will appear at the bottom left.
Test if the SIM is detected in Safe Mode.
If SIM works in Safe Mode: A third-party app is causing the problem. Restart normally and uninstall recently added apps one by one until you find the culprit.
If SIM still doesn’t work in Safe Mode: Not an app issue. Continue to Step 14.
To exit Safe Mode: Just restart normally.
Step 14: Hardware Test with Diagnostic Menu

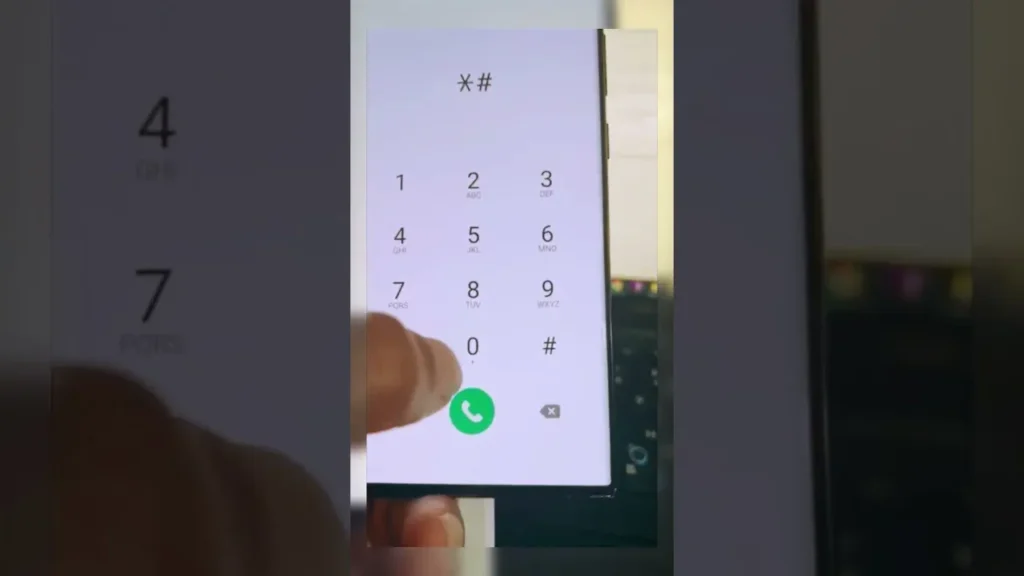
Open your Phone app.
Dial: *#0*#
A diagnostic grid appears. Find the SIM Card test (if your model has it).
Run the test.
Test fails: Hardware problem confirmed. Skip to Step 15.
Test passes: Software corruption. Try Step 15 anyway since you’ve exhausted software fixes.
Step 15: Factory Reset (Last Software Attempt)
WARNING: This erases everything on your phone. Back up your data first.
Settings → General Management → Reset → Factory Data Reset.
Follow prompts to reset.
Phone will restart and take you through initial setup again.
Test the SIM after setup completes.
Still not working after factory reset? Hardware failure. Move to Step 16.
Step 16: Professional Repair Required
You’ve confirmed hardware failure. Your options:
If phone is under warranty: Contact Samsung support. They’ll set up a repair or replacement. Takes 1-2 weeks typically.
If out of warranty: Visit a phone repair shop. SIM reader replacement costs $50-150 depending on your model.
Common hardware causes:
- Damaged SIM reader flex cable (from drops).
- Water corrosion on internal contacts.
- Defective SIM reader component.
- Logic board damage.
Professional diagnostics will identify exactly what failed before repair. Many repair services can test your phone and give you a quote.
Model-Specific Quick Notes
S24 Ultra / S23 Ultra: Known SIM reader failures in first year. Warranty should cover.
Z Fold 6 / Z Flip 6: Make sure phone closes completely flat. Folding mechanism can stress the SIM area.
S21 FE: One UI 7 update broke network registration for many users. Model identifier changed from SM-G990U1 to SM-G990U1/DS. No fix yet except waiting for Samsung patch.
A Series phones: SIM readers fail more often than flagship models. Same fixes apply.
Still Stuck?
For general phone SIM troubleshooting that applies to all brands (not just Samsung), including carrier outage checks and additional diagnostic techniques, see our complete guide on fixing “No SIM” or “No Service” errors.
If software fixes didn’t work and diagnostics point to hardware failure, professional phone repair services can identify the exact failed component and give you a repair quote before committing to the work.