iTunes may get stuck at certain times when you are restoring your iPhone or iPad,not allowing you to go any further. If you are a user who has encountered an iPhone frozen, you may need to use iTunes to fix it, but when iTunes gets stuck, all your efforts will fail. This article will provide you with practical solutions in this aspect. Let’s start right away without too many speeches.
Check the network connection.
When you find yourself with iTunes stuck on verifying iPhone restore, what you will need to do first is inspect your network connection. This is the most basic thing to do, as the restoration process requires a good internet connection. So when you are trying to reset your iPhone, make sure you have a good connection. Check this out first. If it is unstable, use another, more reliable connection. Also, we recommend you use Wi-Fi and not cellular data, in case you are using it. If this tip didn’t help, try the next one.
Use Another Computer
If your iTunes is stuck on the “Verifying iPhone Restore” screen, you should also try again with another computer. There are several reasons why your PC may not support this feature. Maybe the speed of your computer is not fast enough. Maybe iTunes is corrupt or that the USB ports you use are not supported at this time. Also, there are chances that the lightning cable cannot connect to the ports on the PC you are using due to accumulated dust in the contacts. There are tons of reasons why iTunes may not work. However, if you are in a hurry, we recommend using another PC.
Turn off the antivirus software.
Antivirus software and firewall settings can be one reason iTunes may get stuck on the “Verify iTunes Restore” screen. It is therefore important to check this software to see if they are the culprits.

Firewalls, anti-virus, and anti-malware are the most popular causes of the network timed-out error during a restore or software upgrade. So, turn off or disable everything, including the Windows firewall, and try again. If this is the case, then you may want to temporarily disable them, at least until the reset is completed.
Update iTunes to the Latest Version
Another common thing to check in case your iTunes gets stuck on the “Verify iPhone Restore” screen is the version of iTunes itself. You should check now and then to make sure new iTunes updates are installed correctly right away.
To do this on your Mac, just visit the App Store and find the “Updates” option at the top. You will be able to understand if there are any updates available. If they are not installed, we recommend doing it immediately.
On a Mac (with macOS Mojave installed):
If you’re running macOS Mojave, please update iTunes by following the steps below:
Step 1: From the Apple menu, select System Preferences, then Software Update to check for updates.
Step 2: To install any available updates, click the “Update Now” button. Alternatively, you can click “More info” to view more information about each update and choose which ones to install.
Step 3: If Software Update says your Mac is up to date, that means macOS and all of its apps are up to date as well. even Safari, iTunes, Books, Messages, Mail, Calendar, Photos, and FaceTime are all included.
For Older versions of MacOS X
If you’re running an older version of Mac OS X, please follow these instructions to update iTunes:
Step 1: On your Mac, launch the App Store app.
Step 2: In the App Store toolbar, select Updates.
Step 3: Using the Update buttons, download and install any available updates.
How to update iTunes on Windows

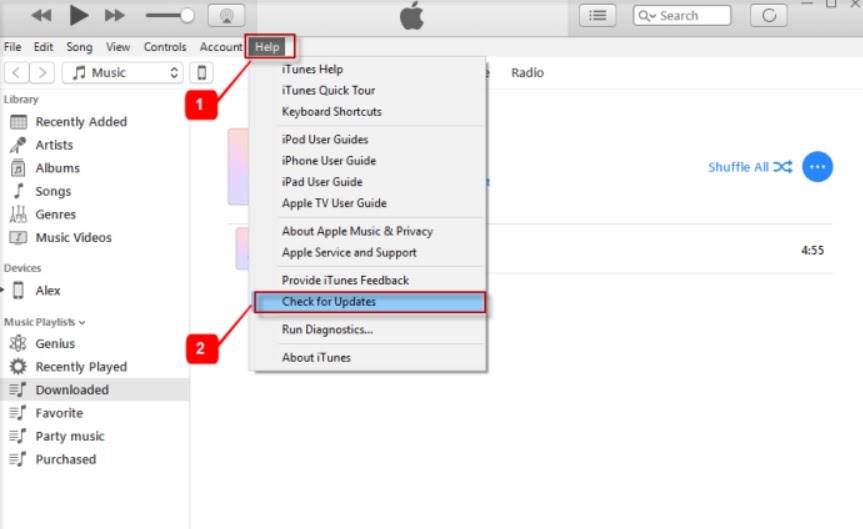
Open iTunes and select “Help” from the menu bar to upgrade iTunes on Windows. If an update is available, click “Check for Updates” and install it. We hope you found the tip useful.
Restart the iPhone
You can restart your iOS device to fix minor bugs and errors. Restarting the iPhone is one of the most effective ways to troubleshoot the iPhone. When your iPhone freezes, you can force restart the iPhone first, instead of relying on iTunes
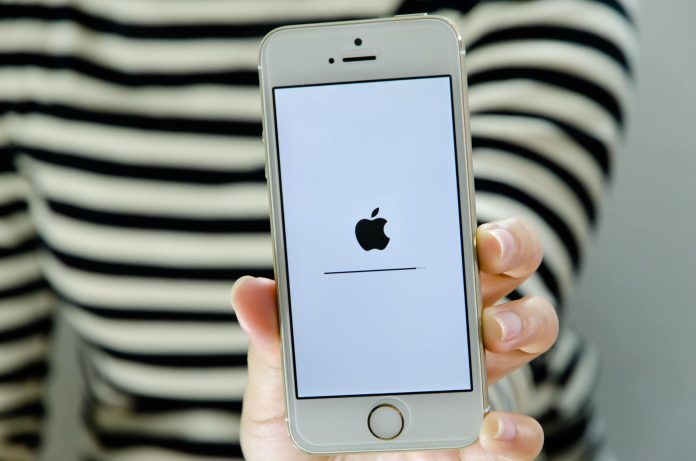
You can see the screen turned off and on. Do not release the two buttons until the Apple logo appears on the screen. Anyway, it depends on the iPhone model. Different models restart differently. Let me tell you about how you can force restart different models.
How to force restart different models
Here is how to force restart an iPhone with different models.
For iPhone X. XS, XR, iPhone 11, 12 and 13
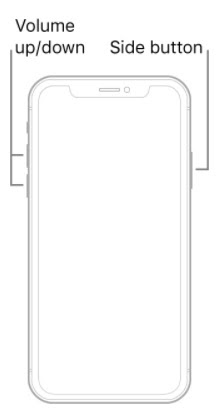
Follow these steps to force restart your iPhone X, iPhone XS, iPhone XR, iPhone 11, iPhone 12, or iPhone 13:
Press and fast release the volume up and down buttons, then press and hold the side button. Release the button when the Apple logo displays.

Force restart for iPhone 8 or iPhone SE
Press and fast release the volume up and down buttons, then press and hold the side button. Release the button when the Apple logo displays.
Force restart iPhone 7
At the same time, press and hold the volume down and the Sleep/Wake buttons. Then release both buttons when the Apple logo appears.
Force restart of iPhone 6s
At the same moment, press and hold the Sleep/Wake button and the Home button. Now release both buttons when the Apple logo appears.
Contact Apple Support:
If none of these procedures have resolved your issue, and iTunes stuck on verifying iPhone restore, your issue may be larger or more difficult to resolve at home. It’s time to call in the professionals: Apple.
Apple provides telephone help (charges will apply if your phone is no longer under warranty). You can also get support in person at an Apple Store. If you prefer this, make an appointment with the Apple Genius Bar ahead of time. There’s a lot of demand for tech help at the Apple Store, and you’ll probably have to wait a long time if you don’t make an appointment.
Conclusion:
In the article, we talk about how you can fix the problem if your iTunes is stuck while you are verifying an iPhone restore. We recommend you to solve this issue first at your home, if the problem is not solved through these easy steps then you should contact customer support. I hope these easy tips will save you time and money
