One of the most common problems the videographers face is video shakiness. The motion or movement induced in the video without any intention ruins the influence of the video.
This then raises the need for subjection to video stabilization. By doing so, you can ensure the professionalism and smoothness of your videos. Whether you are a pro or a novice, jitteriness can prevent you from achieving your goals regarding video editing. This way, you can also limit your work impact.
You don’t need to worry in this regard, as this all-in-one guide will be your go-to source for everything related to video stabilization. It is similar to the remarkable tool referred to as the video editor for YouTube. Keep reading to get expert insights on the intro, how to use it, etc.
Video Stabilizer – Shedding Light
You can define a video stabilizer as an application that works on AI (Artificial Intelligence). The AI makes it capable of completely removing the jitterness, vibrations, movements, etc., from your video. It adds a professional touch to your videos and makes them more engaging. One of the most notable things about this tool is that it is available online and on the web. This increases the accessibility of this remarkable tool.
Video Stabiliser – Inner Working Revealed
The video stabilizer consists of a working process with a few steps every user needs to follow. Some of the key steps are as follows:
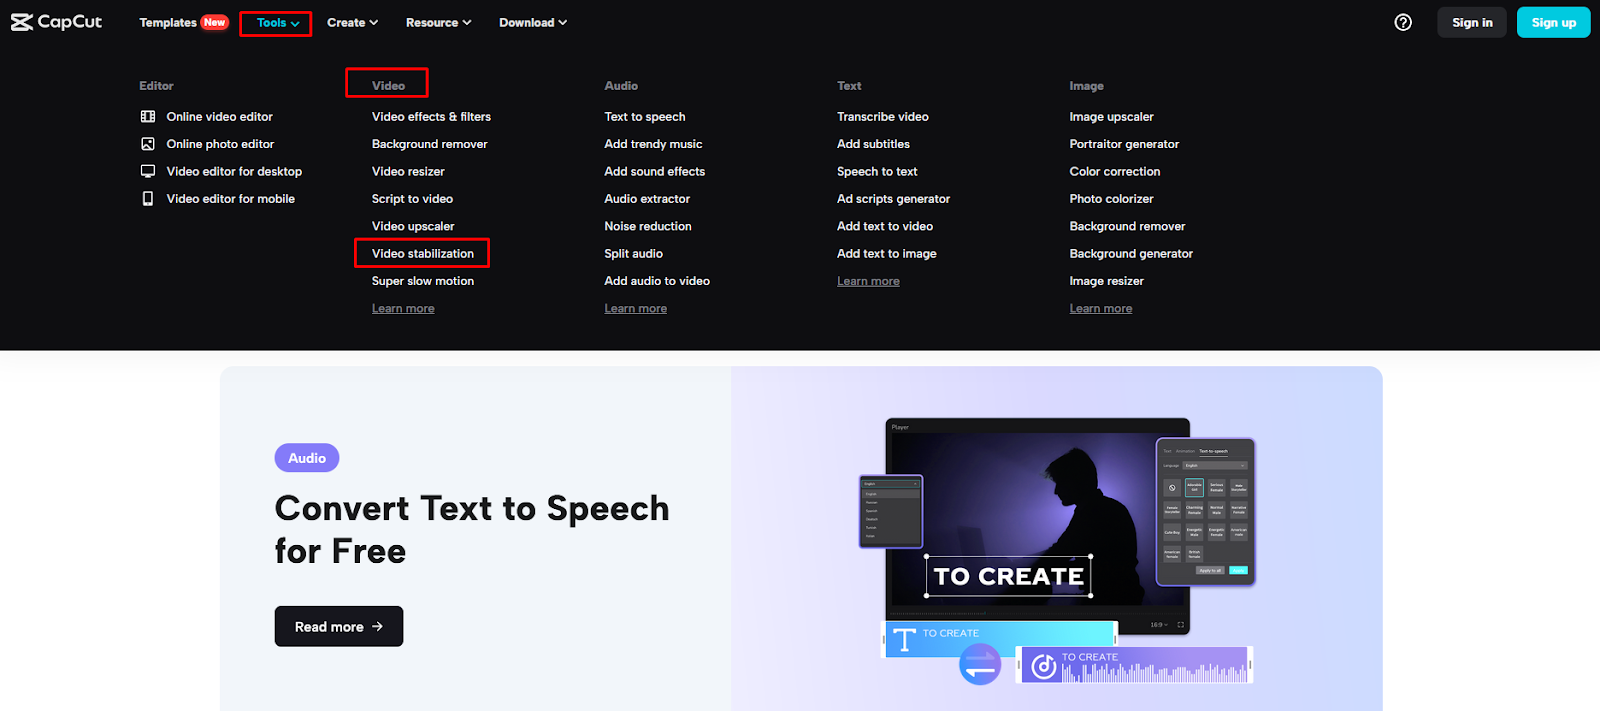
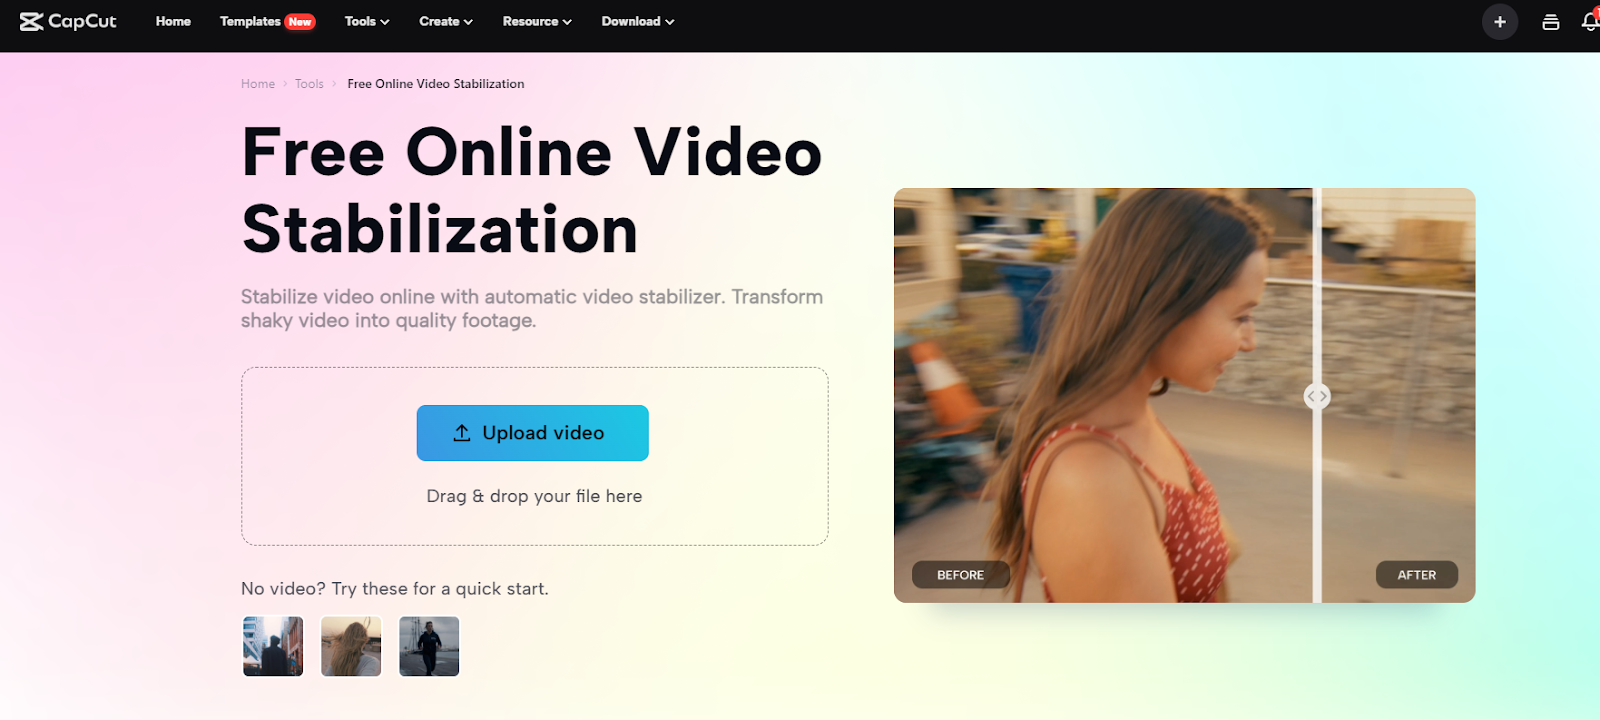
- To start the video stabilizer utilization process, go to the CapCut website. When you are on the main site, you will see a menu bar on the interface top containing the “tool tab”. Access this tab and click on it. This will open up a menu containing the tool from various categories such as audio, video, image, etc. Each category contains multiple tools on the list. You need to go to the video section and click on the video stabilization tool. By doing this, you will be right on the main page of the video stabilizer tool.
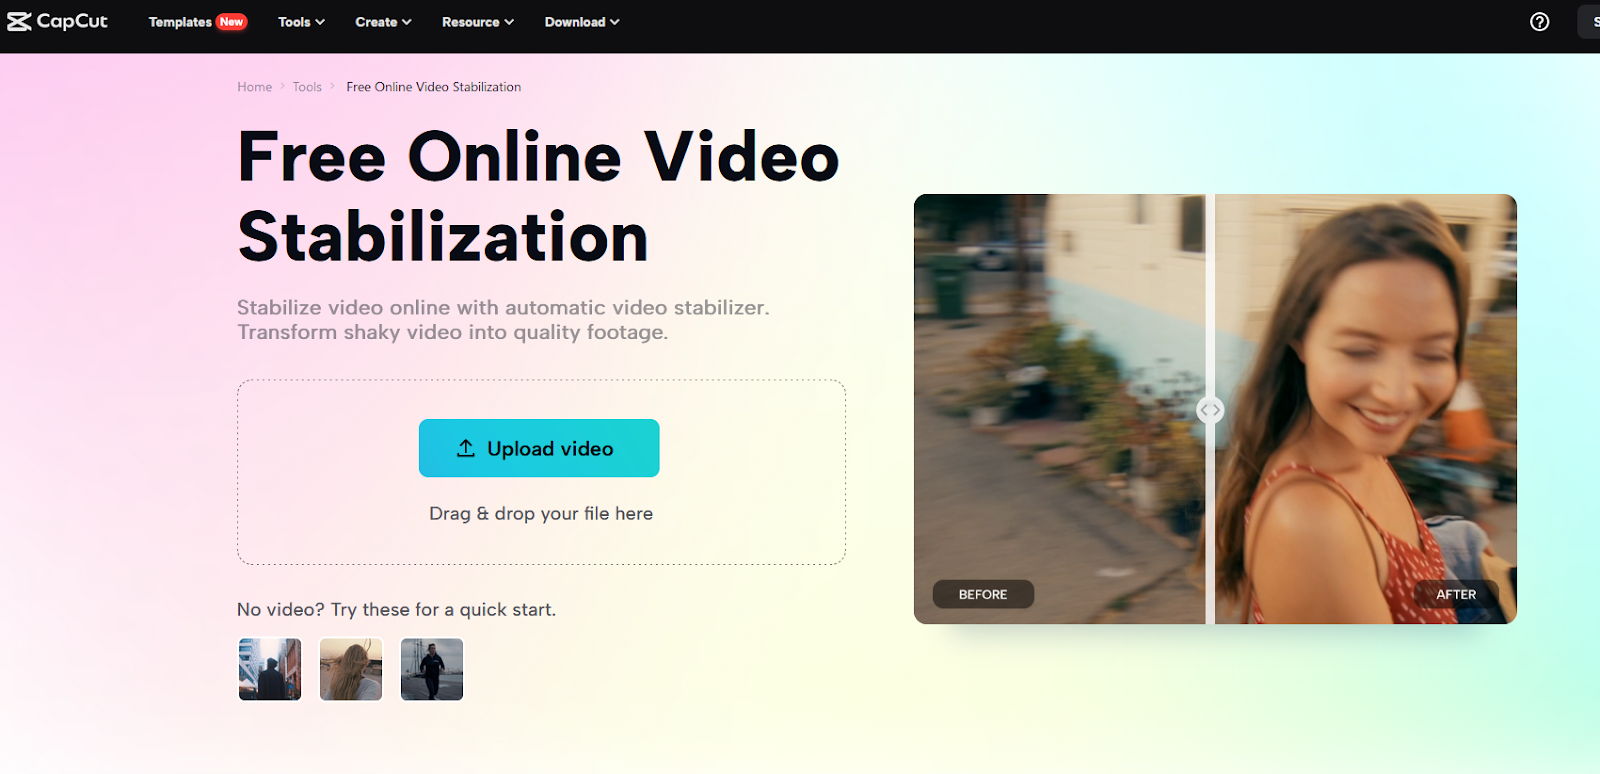
- Later, when you have accessed the video stabilizer tool. Now, real work starts. You need to upload the video which you want to stabilize. The video stabilizer allows you to do the same in two ways. One way is to use the drag-and-drop option. This is a super easy and quick way to upload the video. Using this option, you can do the same using the cloud storage or Google Drive. Another way is the upload video tab utilization. You can click on the Upload video tab. A window will pop up, guiding you to where you want to go to pick up and upload the file. You can access either folder, drive subfolders, etc.
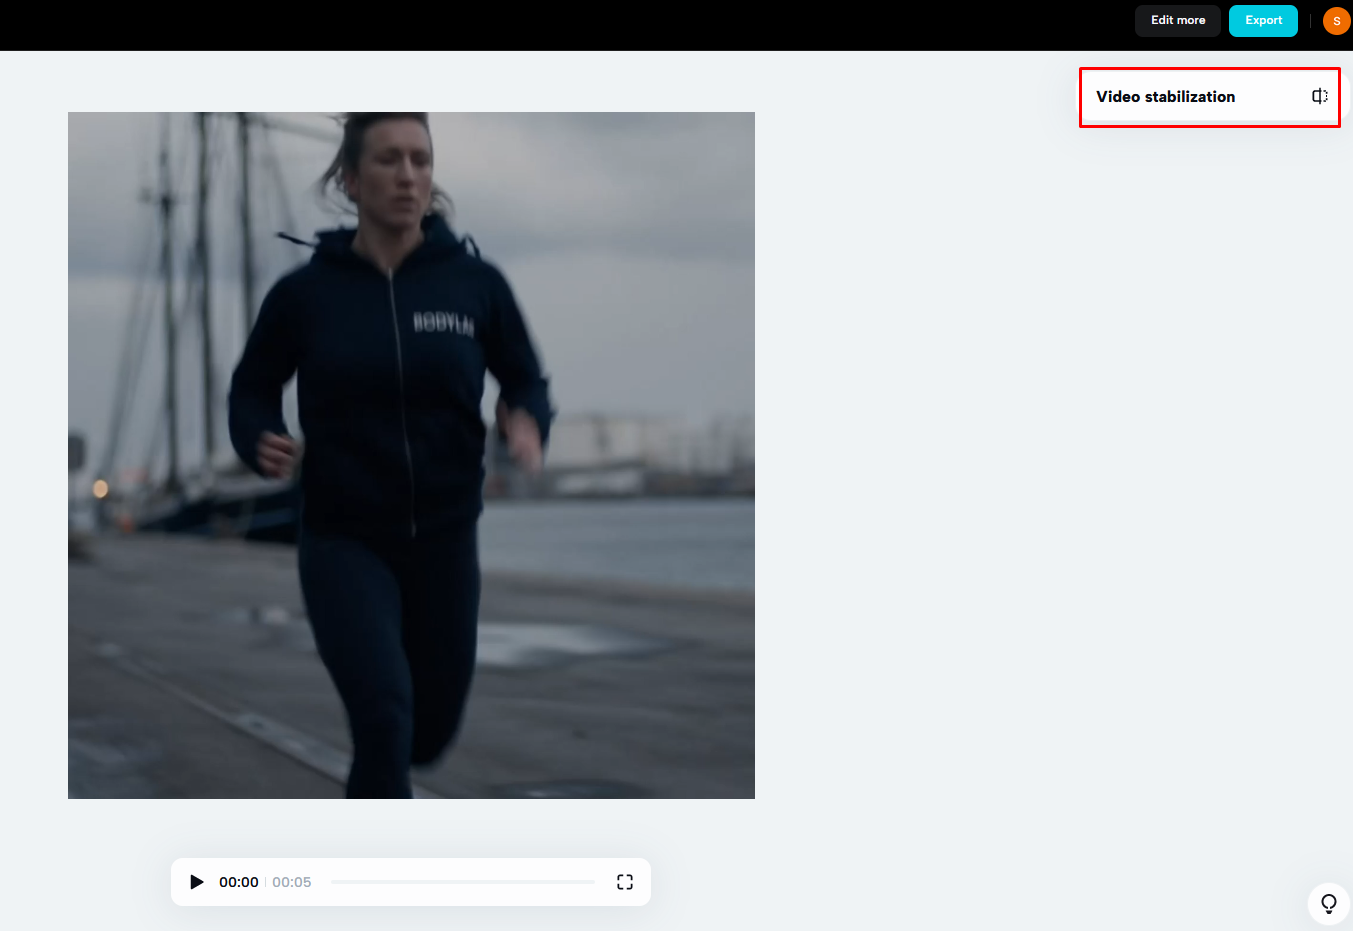
- After completing the second step, there is nothing more you need to do on your side. The AI technology of the tool will take care of the rest. It detects flaws, blurs, moving objects/things, etc. Then, after detection, the tool automatically smoothens them out and makes your video look professional and smoother. When the AI is done, it offers you an option to revert the changes to see how it looks before and after. The video stabilizer present in the top right corner will assist in this regard.
- When you are satisfied, you can begin downloading the video. To do so, access the export tab in the top right corner above the video stabilizer tab. Click on this tab. Doing so will open up a series of options. It allows you to upload it on TikTok as a video or ad. You can also download it to your system directly. In case you don’t like the final video, you can also tweak the result with magic tools at the bottom.
This is how you can use the video stabilizer by following the above steps.
Things You Need To Get Started Using The Video Stabilizer
There are four things that you need to access and benefit from the video stabilizer. These are as follows for your consideration:
- A PC/ Laptop/ Smartphone/ Tablet
- The exact and authentic URL of the video stabilizer
- Search Engine Browser
- Internet access
Practical Benefits of The Video Stabiliser
There is a long list of benefits that you can reap/harness using the video stabilizer. A few of them are right below for your reference:
Eliminate Low Light Blurriness
Video stabilizer features incredible and advanced AI technology. It detects the low-light blurry areas from your video and removes them by lighting up and eliminating the blurriness. These effects prevent the viewers and audience from differentiating the fine details.
Optimum Zoom In
If the jitteriness or shakiness exceeds the video stabilizer, apply the optimum zoom-in level without disturbing the other details. This, in short, adds up to the visual appeal of your video. Apart from this, with this tool, you can also experience a crop to highlight details and stabilize the video.
No Limit
Using the video stabilizer, you can convert as many unstabilized videos to stabilized videos as you want. You need to note all of this without paying a single penny. This makes the video stabilizer a standing-out tool in the market.
Zero Complicacy
The video stabilizer is highly desirable even for those who don’t possess a specific knowledge or degree. Anyone can access it and use it without any level of complicity. This benefit lies among the highly practical ones on the list.